Pre-requisites for Deploying NAI
In this part of the lab we will prepare pre-requisites for LLM application on GPU nodes.
The following is the flow of the applications lab:
stateDiagram-v2
    direction LR

    state PreRequisites {
        [*] --> CreateFilesShare
        CreateFilesShare --> PrepareHuggingFace
        PrepareHuggingFace --> [*]
    }
    state CreateOfflineHelmContainers {
        [*] --> PrepareNAIHelmCharts
        PrepareNAIHelmCharts --> PrepareNAIContainerImages
        PrepareNAIContainerImages --> [*]
    }

    [*] --> PreRequisites
    PreRequisites --> CreateOfflineHelmContainers
    CreateOfflineHelmContainers --> DeployNAI : next section
    DeployNAI --> TestNAI
    TestNAI --> [*]
Prepare the following pre-requisites needed to deploy NAI on target kubernetes cluster.
Create Nutanix Files Share
We will create Nutanix Files storage class which will be used to create a pvc that will store the LLama-3-8B model files.
- In Prism Central, choose Files from the menu
- Choose the file server (e.g. labFS)
- Click on Shares & Exports
- Click on +New Share or Export
-
Fill the details of the Share
- Name -
model_share - Description - for NAI model store
- Share path - leave blank
- Max Size - 10 GiB (adjust to the model file size)
- Primary Protocol Access - NFS
- Name -
-
Click Next and make sure Enable compression in checked
- Click Next
-
In NFS Protocol Access, choose the following:
- Authentication - System
- Default Access (for all clients) - Read-Write
- Squash - Root Squash
Note
Consider changing access options for Production environment
-
Click Next
- Confirm the share details and click on Create
- This is where all the pvc will be created for the models eventually
- Create another share using the same steps for initial model download that will be mounted on the jumphost
- Name -
model_download - Description - for NAI model store
- Share path - leave blank
- Max Size - 10 GiB (adjust to the model file size)
- Primary Protocol Access - NFS
- Authentication - System
- Default Access (for all clients) - Read-Write
- Squash - Root Squash
- Name -
Create the Files Storage Class
-
Run the following command to check K8S status of the
nkpdarksitecluster$ kubectl get nodes NAME STATUS ROLES AGE VERSION nkpdarksite-md-0-x948v-hvxtj-9r698 Ready <none> 4h49m v1.29.6 nkpdarksite-md-0-x948v-hvxtj-fb75c Ready <none> 4h50m v1.29.6 nkpdarksite-md-0-x948v-hvxtj-mdckn Ready <none> 4h49m v1.29.6 nkpdarksite-md-0-x948v-hvxtj-shxc8 Ready <none> 4h49m v1.29.6 nkpdarksite-r4fwl-8q4ch Ready control-plane 4h50m v1.29.6 nkpdarksite-r4fwl-jf2s8 Ready control-plane 4h51m v1.29.6 nkpdarksite-r4fwl-q888c Ready control-plane 4h49m v1.29.6 -
In VSC Explorer, click on New File and create a config file with the following name:
Add the following content and replace the
nfsServerNamewith the name of the Nutanix Files server name .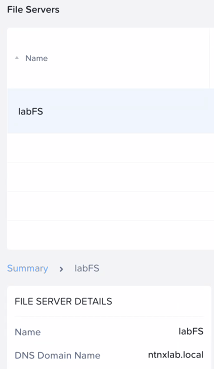
-
Create the storage class
-
Check storage classes in the cluster for the Nutanix Files storage class
kubectl get storageclass

NAME                       PROVISIONER                     RECLAIMPOLICY   VOLUMEBINDINGMODE      ALLOWVOLUMEEXPANSION   AGE
dkp-object-store           kommander.ceph.rook.io/bucket   Delete          Immediate              false                  28h
nai-nfs-storage            csi.nutanix.com                 Delete          Immediate              true                   24h
nutanix-volume (default)   csi.nutanix.com                 Delete          WaitForFirstConsumer   false                  28h
Request Access to Model on Hugging Face
Gated models will require a Hugging Face token to be able to download.
In this section we will create a token as Meta-Llama is a gated model.
Info
Non-gated models can be directly downloaded using Hugging Face CLI.
Follow these steps to request access to the meta-llama/Meta-Llama-3.1-8B-Instruct model:
LLM Recommendation
From testing google/gemma-2-2b-it model is quicker to download and obtain download rights, than meta-llama/Meta-Llama-3.1-8B-Instruct model.
Feel free to use the google/gemma-2-2b-it model if necessary. The procedure to request access to the model is the same.
-
Sign in to your Hugging Face account:
- Visit Hugging Face and log in to your account.
-
Navigate to the model page:
- Go to the Meta-Llama-3.1-8B-Instruct model page.
-
Request access:
- On the model page, you will see a section or button labeled Request Access (this is usually near the top of the page or near the "Files and versions" section).
- Click Request Access.
-
Complete the form:
- You may be prompted to fill out a form or provide additional details about your intended use of the model.
- Complete the required fields and submit the request.
-
Wait for approval:
- After submitting your request, you will receive a notification or email once your access is granted.
- This process can take some time depending on the approval workflow.
Once access is granted, there will be an email notification.
Note
Email from Hugging Face can take a few minutes or hours before it arrives.
Create a Hugging Face Token with Read Permissions
Follow these steps to create a Hugging Face token with read permissions:
-
Sign in to your Hugging Face account:
- Visit Hugging Face and log in to your account.
-
Access your account settings:
- Click on your profile picture in the top-right corner.
- From the dropdown, select Settings.
-
Navigate to the "Access Tokens" section:
- In the sidebar, click on Access Tokens.
- You will see a page where you can create and manage tokens.
-
Create a new token:
- Click the New token button.
- Enter a name for your token (i.e.,
read-only-token).
-
Set token permissions:
- Under the permissions dropdown, select Read. For Example:

- Under the permissions dropdown, select Read. For Example:
-
Create and copy the token:
- After selecting the permissions, click Create.
- Your token will be generated and displayed only once, so make sure to copy it and store it securely.
Use this token for accessing Hugging Face resources with read-only permissions.
Download the model
We have two options in downloading a model to be accessed later by NAI.
Nutanix Files and Nutanix Objects (bucket) can be mounted as a file share on the jumphost with secure mount options.
- File share - create a file share on Nutanix Files and mount it on the jumphost
- Object storage - create a bucket on Nutanix Objects and mount it as a file share on the jumphost
File Share
File Share Design
For production environments, consider creating two file shares:
- For model initial download location -
/model_downloadfor example - For NAI to store models -
/model_share
This will ensure that concurrency and latency requirements are taken care of.
-
In Nutanix Files, create the
/model_downloadshare by following instructions here -
Mount the
/model_downloadfile share created here on the jumphost using the following script#!/bin/bash set -e # ============================================================================== # CONFIGURATION # ============================================================================== # 1. Hugging Face Access Token (Must have accepted license terms on the web repo) HF_TOKEN="hf_your_actual_token_here" # 2. File share mounting details SHARE_SOURCE="labFS.ntnxlab.local:/model_download" SHARE_TYPE="nfs" SHARE_OPTIONS="rw,sync,hard,intr" # Target Directories MOUNT_POINT="/model_share" TARGET_DIR="${MOUNT_POINT}/Llama-3.1-8B-Instruct" MODEL_REPO="meta-llama/Llama-3.1-8B-Instruct" # Binary Location from pipx HF_BIN="/root/.local/bin/hf" # ============================================================================== # 1. MOUNT FILE SHARE # ============================================================================== echo "Creating mount point folder at ${MOUNT_POINT}..." mkdir -p "${MOUNT_POINT}" echo "Mounting ${SHARE_SOURCE} to ${MOUNT_POINT}..." if mountpoint -q "${MOUNT_POINT}"; then echo "Directory is already mounted." else sudo mount -t "${SHARE_TYPE}" -o "${SHARE_OPTIONS}" "${SHARE_SOURCE}" "${MOUNT_POINT}" echo "Mount successful." fi # Create the final model directory inside the share # (This side-steps root-squashing permissions on the parent directory) echo "Preparing local target folder..." mkdir -p "${TARGET_DIR}" # ============================================================================== # 2. DOWNLOAD VIA MODERN HF CLIENT # ============================================================================== echo "Starting download for ${MODEL_REPO} using modern hf CLI..." # Run the download command referencing the direct absolute path # Using the updated 'hf download' structure and mapping parameters ${HF_BIN} download \ "${MODEL_REPO}" \ --local-dir "${TARGET_DIR}" \ --token "${HF_TOKEN}" echo "Download completed successfully!" echo "Model files are located at: ${TARGET_DIR}"Creating mount point at /model_share... Mounting labFS.ntnxlab.local:/model_share/ to /model_download... Directory is already mounted. 'huggingface-hub' already seems to be installed. Not modifying existing installation in '/root/.local/share/pipx/venvs/huggingface-hub'. Pass '--force' to force installation. injected package hf-transfer into venv huggingface-hub done! ✨ 🌟 ✨ Starting download for meta-llama/Llama-3.1-8B-Instruct... /root/.local/share/pipx/venvs/huggingface-hub/lib/python3.12/site-packages/huggingface_hub/constants.py:298: FutureWarning: The `HF_HUB_ENABLE_HF_TRANSFER` environment variable is deprecated as 'hf_transfer' is not used anymore. Please use `HF_XET_HIGH_PERFORMANCE` instead to enable high performance transfer with Xet. Visit https://huggingface.co/docs/huggingface_hub/package_reference/environment_variables#hfxethighperformance for more details. warnings.warn( Downloading bytes: | 0.00B Still waiting to acquire lock on /model_share/Llama-3.1-8B-Instruct/.cache/huggingface/.gitignore.lock (elapsed: 0.1 seconds)es: 0%| | 0/17 [00:00<?, ?it/s] Fetching 17 files: 100%|████████████████████████████████████████████████████| 17/17 [01:07<00:00, 3.98s/it] Download complete: : ███████████████████████████████████████████████████████████████████| 27.6GB, 37.5MB/s ✓ Downloadedion complete: 100%|█████████████████████████████████████████████████| 32.1GB / 32.1GB, 303MB/s path: /model_share/Llama-3.1-8B-Instruct Download complete: : ███████████████████████████████████████████████████████████████████| 27.6GB, 37.5MB/s Reconstruction complete: 100%|█████████████████████████████████████████████████| 32.1GB / 32.1GB, 303MB/s Download completed successfully! Model located at: /model_share/Llama-3.1-8B-Instruct -
Confirm model files in the directory on the File share
$ ls -l /model_share/Llama-3.1-8B-Instruct/
#
total 15714428
drwxr-xr-x  4 4294967294 4294967294         18 Jul 20 01:34 ./
drwxrwxrwt 12 root       root               12 Jul 20 01:38 ../
drwxr-xr-x  3 4294967294 4294967294          3 Jul 20 01:33 .cache/
-rw-r--r--  1 4294967294 4294967294       1519 Jul 20 01:33 .gitattributes
-rw-r--r--  1 4294967294 4294967294       7627 Jul 20 01:33 LICENSE
-rw-r--r--  1 4294967294 4294967294      44044 Jul 20 01:33 README.md
-rw-r--r--  1 4294967294 4294967294       4691 Jul 20 01:33 USE_POLICY.md
-rw-r--r--  1 4294967294 4294967294        855 Jul 20 01:33 config.json
-rw-r--r--  1 4294967294 4294967294        184 Jul 20 01:33 generation_config.json
-rw-r--r--  1 4294967294 4294967294 4976698672 Jul 20 01:34 model-00001-of-00004.safetensors
-rw-r--r--  1 4294967294 4294967294 4999802720 Jul 20 01:34 model-00002-of-00004.safetensors
-rw-r--r--  1 4294967294 4294967294 4915916176 Jul 20 01:34 model-00003-of-00004.safetensors
-rw-r--r--  1 4294967294 4294967294 1168138808 Jul 20 01:33 model-00004-of-00004.safetensors
-rw-r--r--  1 4294967294 4294967294      23950 Jul 20 01:33 model.safetensors.index.json
drwxr-xr-x  2 4294967294 4294967294          5 Jul 20 01:34 original/
-rw-r--r--  1 4294967294 4294967294        296 Jul 20 01:33 special_tokens_map.json
-rw-r--r--  1 4294967294 4294967294    9085657 Jul 20 01:33 tokenizer.json
-rw-r--r--  1 4294967294 4294967294      55351 Jul 20 01:33 tokenizer_config.json
Buckets Store
Follow the same procedure to mount the bucket on the jump host and download the model.
- Create a bucket
- Create access and secret keys
- Enable NFS mount options on the buckets
- Mount the share on jumphost VM
- Download the model to mounted file share using the script in the previous section
Prepare Container Images and Helm Charts
The Jumphost VM will be used as a medium to download the NAI container images and upload them to the internal Harbor container registry.
stateDiagram-v2
    direction LR

    state LoginToNutanixPortal {
        [*] --> CreateDockerIDandAccessToken
        CreateDockerIDandAccessToken --> LoginToDockerCLI
        LoginToDockerCLI --> [*]
    }

    state PrepareNAIDockerImages {
        [*] --> DownloadUploadImagesToHarbor
        DownloadUploadImagesToHarbor --> [*]
    }

    [*] --> LoginToNutanixPortal
    LoginToNutanixPortal --> PrepareNAIDockerImages
    PrepareNAIDockerImages --> CreateNKPCatalogCollection
    CreateNKPCatalogCollection --> [*]
Prepare Environment
In this section we will use NKP product catalog extensions to prepare NAI container images.
High Level Steps
- Login to docker.io using
ntnxsvcgptaccount (obtained from Portal) - Create NAI Airgap bundle
- Push the bundle to local (internal) Harbor registry
- Create NAI Catalog collection and use this to install all pre-requisites and NAI
We will prepare the helm charts necessary for NAI and pre-requisite applications install:
- NAI
- Envoy Gateway
- Kserve
- OpenTelemetry Operator
The procedure will be done on the jumphost VM.
-
Login to Nutanix Portal using your credentials
-
Go to Downloads > Nutanix Eneterprise AI > Manage Access Token
-
Copy the download
ntnxsvcgptaccounts credentials -
Open new
VSCodewindow on your jumphost VM -
In
VSCodeExplorer pane, click on existing$HOMEfolder -
Click on New Folder name it:
airgap-nai -
On
VSCodeExplorer plane, click the$HOME/airgap-naifolder -
On
VSCodemenu, selectTerminal>New Terminal -
Browse to
airgap-naidirectory -
In
VSC, under the newly createdairgap-naifolder, click on New File and create file with the following name: -
Add (append) the following environment variables and save it
export DOCKER_NAI_USERNAME=ntnxsvcgpt export DOCKER_NAI_PAT=_XXXXXXXXXXXXXXXXXXXXXXXXXXXXXXXXXXXXXXX export HARBOR_REGISTRY=_your_harbor_registry_url export HARBOR_REGISTRY_USERNAME=admin export HARBOR_REGISTRY_PASSWORD=_xxxxxxx export HARBOR_PROJECT=_your_harbor_project_name # (1)! export HARBOR_REGISTRY_CACERT=_path_to_ca_cert_of_registry # (2)!- The Harbor project must exist for uploads to work
- File must contain private CA server and Harbor server's public certificate in one file
export DOCKER_NAI_USERNAME=ntnxsvcgpt export DOCKER_NAI_PAT=_XXXXXXXXXXXXXXXXXXXXXXXXXXXXXXXXXXXXXXX export HARBOR_REGISTRY=harbor.10.x.x.134.nip.io export HARBOR_REGISTRY_USERNAME=admin export HARBOR_REGISTRY_PASSWORD=_xxxxxxx export HARBOR_PROJECT=nutanix # (1)! export HARBOR_REGISTRY_CACERT=$HOME/harbor/certs/full_chain.pem # (2)!- The Harbor project must exist for uploads to work - we will create the project in the next step
- File must contain privatre CA server and Harbor server's public certificate in one file
-
Source the
$HOME/airgap-nai/.envfile to import environment variables -
Create a project called
nutanixin the Harbor registry using the followingcurlcommand or simply use the Harbor GUI -
If your Harbour registry is certified by a private CA, make sure to copy the CA's public key
${HARBOR_REGISTRY_CACERT}to your jumphost's Docker certificate store -
Clone NKP product catalog git repository
-
Login to
docker.iowithntnxsvcgptcredentials to be able to download NAI container images and artifacts$ docker login -u ntnxsvcgpt -p _XXXXXXXXXXXXXXXXXXXXXXXXXXXXXXXXXXXXXXX # i Info → A Personal Access Token (PAT) can be used instead. To create a PAT, visit https://app.docker.com/settings Password: WARNING! Your credentials are stored unencrypted in '/home/ubuntu/.docker/config.json'. Configure a credential helper to remove this warning. See https://docs.docker.com/go/credential-store/
Create NAI Airgap Bundle and NKP Catalog Applications
In this section we will create the NKP catalog applications components that can be used to deploy pre-requistes applications.
-
Run the following command to check K8S status of the
nkpdarksitecluster and set context for NKP cluster$ kubectl get nodes NAME STATUS ROLES AGE VERSION nkpdarksite-md-0-x948v-hvxtj-9r698 Ready <none> 4h49m v1.29.6 nkpdarksite-md-0-x948v-hvxtj-fb75c Ready <none> 4h50m v1.29.6 nkpdarksite-md-0-x948v-hvxtj-mdckn Ready <none> 4h49m v1.29.6 nkpdarksite-md-0-x948v-hvxtj-shxc8 Ready <none> 4h49m v1.29.6 nkpdarksite-r4fwl-8q4ch Ready control-plane 4h50m v1.29.6 nkpdarksite-r4fwl-jf2s8 Ready control-plane 4h51m v1.29.6 nkpdarksite-r4fwl-q888c Ready control-plane 4h49m v1.29.6 -
Create the Airgap bundle for NAI
$ nkp create catalog-bundle --airgapped --collection-tag 2.18 \ --apps=nutanix-ai=2.8.0,envoy-gateway-nai=1.8.1,kserve=0.19.0,opentelemetry-operator=0.114.1,leaderworkerset=0.8.0 # Bundling 5 application(s) (airgapped : true) ✓ Building OCI artifact nkp-nutanix-product-catalog/collection:2.18 ✓ Building OCI artifact nkp-nutanix-product-catalog/nutanix-ai:2.8.0 ✓ Building OCI artifact nkp-nutanix-product-catalog/envoy-gateway-nai:1.8.1 ✓ Building OCI artifact nkp-nutanix-product-catalog/kserve:0.19.0 ✓ Building OCI artifact nkp-nutanix-product-catalog/opentelemetry-operator:0.114.1 ✓ Building OCI artifact nkp-nutanix-product-catalog/leaderworkerset:0.8.0 Processing application artifacts... Processing application nutanix-ai/2.8.0 ✓ K8s [1.35.0 1.36.0]: Parsing resources ✓ K8s v1.35.0: Validating ✓ K8s v1.36.0: Validating Processing application envoy-gateway-nai/1.8.1 ✓ K8s [1.35.0 1.36.0]: Parsing resources ✓ K8s v1.35.0: Validating ✓ K8s v1.36.0: Validating Processing application kserve/0.19.0 ✓ K8s [1.35.0 1.36.0]: Parsing resources ✓ K8s v1.35.0: Validating ✓ K8s v1.36.0: Validating Processing application opentelemetry-operator/0.114.1 ✓ K8s [1.35.0 1.36.0]: Parsing resources ✓ K8s v1.35.0: Validating ✓ K8s v1.36.0: Validating Processing application leaderworkerset/0.8.0 ✓ K8s [1.35.0 1.36.0]: Parsing resources ✓ K8s v1.35.0: Validating ✓ K8s v1.36.0: Validating ✓ Pulling requested images [==================================>75/75] (time elapsed 3m14s) Saving bundle... ✓ Saving application bundle to /home/ubuntu/nkp/nkp-nutanix-product-catalog/nkp-nutanix-product-catalog-2.18-airgapped.tar Run the following to push the artifact to your registry: nkp push bundle --bundle /home/ubuntu/nkp/nkp-nutanix-product-catalog/nkp-nutanix-product-catalog-2.18-airgapped.tar --to-registry <your-registry-url> Run the following command to create catalog artifact(s) after pushing them: nkp create catalog-collection --url oci://<registry-url>/nkp-nutanix-product-catalog/collection --tag 2.18 --workspace kommander-workspace -
Login to your local Harbor registry with credentials to be able to upload NAI container images and artifacts
- Make sure that the private CA's public certificate is in Docker certificate store - documented above
-
Push the created bundle to the registry
nkp push bundle --bundle nkp-nutanix-product-catalog-2.18-airgapped.tar --to-registry harbor.10.x.x.134.nip.io/nutanix ✓ Creating temporary directory ✓ Extracting bundle configs from "nkp-nutanix-product-catalog-2.18-airgapped.tar" ✓ Parsing image bundle config ✓ Starting temporary Docker registry ✓ Pushing bundled images [==================================>75/75] (time elapsed 1m12s) -
Deploy catalog collection
We can now proceed to deploy NAI.