Preparing VPC and Subnets
In this section we will prepare all the networking components necessary for Flow CNI.
Note
The names of network components are for illustrative purposes. Choose your own entity names
Networking Requirements
| Component | Name | Details |
|---|---|---|
| VPC | vpc-lb-flow |
Federated VPC for VM and Containers communications |
| Overlay Subnet | lb-vm-subnet |
Overlay internal only subnet for VM |
| External Subnet 1 | lb-external |
External subnet for Floating IPs - external access for VMs |
| External Subnet 2 | NKP |
External subnet for NKP control plane and worker nodes (deployed in the previous section) |
Network Design
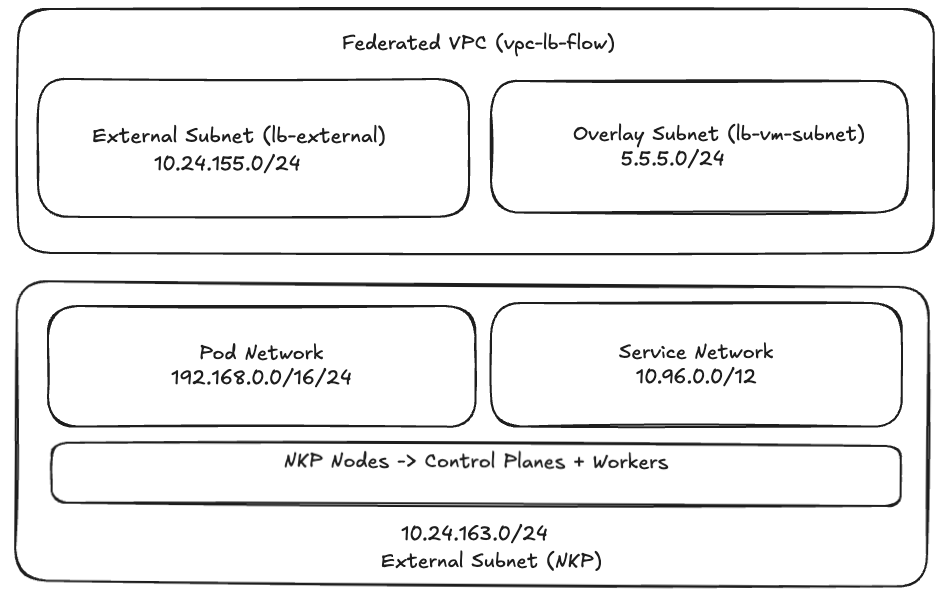
Create Externel Subnet
Note
The IP address schemes are for illustrative purposes. Choose your own subnet details
- Go to Prism Central > Networking > Subnets
-
Click on Create Subnet and fill the following details
- Name:
lb-external - Type: VLAN
- Virtual Switch:
vs0 - VLAN ID: 0
- Exretnal connectivity for VPC - Toggle to
Yesand selectNAT - IP Address Management: Nutanix IPAM
- Network IP Address / Profile:
10.24.152.0/22 - Gateway IP Address:
10.24.152.1 - IP Pool
- Start Address:
10.24.155.106 - End Address:
10.24.155.109
- Start Address:
- Click on Create
- Name:
Activate Nutanix Flow Features on NKP Workload Cluster
- Go to Prism Central > Kubernetes Cluster
- Choose
nkpflowNKP cluster created in the previous section - Click on Activate Nutanix Flow Features
- Paste the contents of
nkpflow.confkubeconfig file - Click on Activate
Info
This Nutanix Flow features' activation will take about 5 minutes
The status can be seen in the nkplb cluster details page
Create VPC
- Go to Prism Central > Networking > VPC
-
Click on Create VPC and fill the following details
- Name:
vpc-lb-flow - Scope: choose both Virtual Machines and Containers
- External Connectivity: choose
lb-externalsubnet created in the previous section - DNS - add
8.8.8.8,8.8.4.4and other preferred DNS servers - Container Networking:
- Kubernetes Cluster:
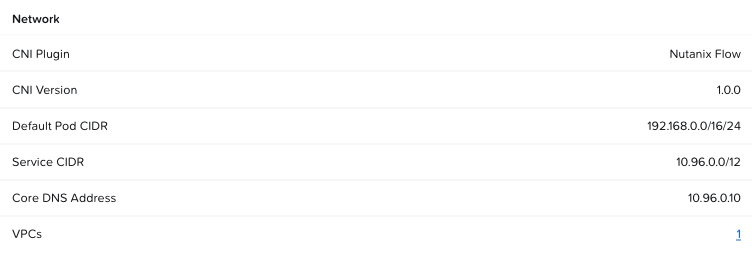
nkpflow - POD CIDR - will be automatically populated with settings from nkpflow cluster creation
- Kubernetes Cluster:
- Click on Create
- Name:
Create Overlay Subnet
- Click the
`vpc-lb-flowVPC and go to Subnets -
Click on Create Subnet with the following details:
- Name:
vpc-lb-flow - Type: Overlay
- IP Assignment Service: Nutanix IPAM
- Network IP Address / Profile:
5.5.5.0/24 - Gateway IP Address:
5.5.5.1 - IP Pool
- Start Address:
5.5.5.10 - End Address:
5.5.5.20
- Start Address:
- Domain Settings:
- Domain Name Servers: add
8.8.8.8,8.8.4.4and other preferred DNS servers - Click on Create
- Name:
We now have all components to deploy apps on VM and containers and test connectivity.